Monday, November 29, 2010

Arf Arf!!

These little guys have been on my to-do list for awhile.
So much fun to make. The tutorial is here, on Denyse Schmidt's website. I got to pull out some of my favorite fabrics- Modern Meadow, Riley Blake Wheels and All Star, Katie Jump Rope. Used some soft brown wool for the sides, and I love the final look and texture. All stuff from my stash! Used some buttons for eyes...not sure if I like the single vintage or stacked buttons best- votes? Then I got them each a real dog collar from my local dollar store for some authenticity!

The boys have made themselves quite at home....

...though someone might be a bit jealous ("Hey! That's MY spot!")


Time for a snack....

..."Back off! those are MY bowls!"
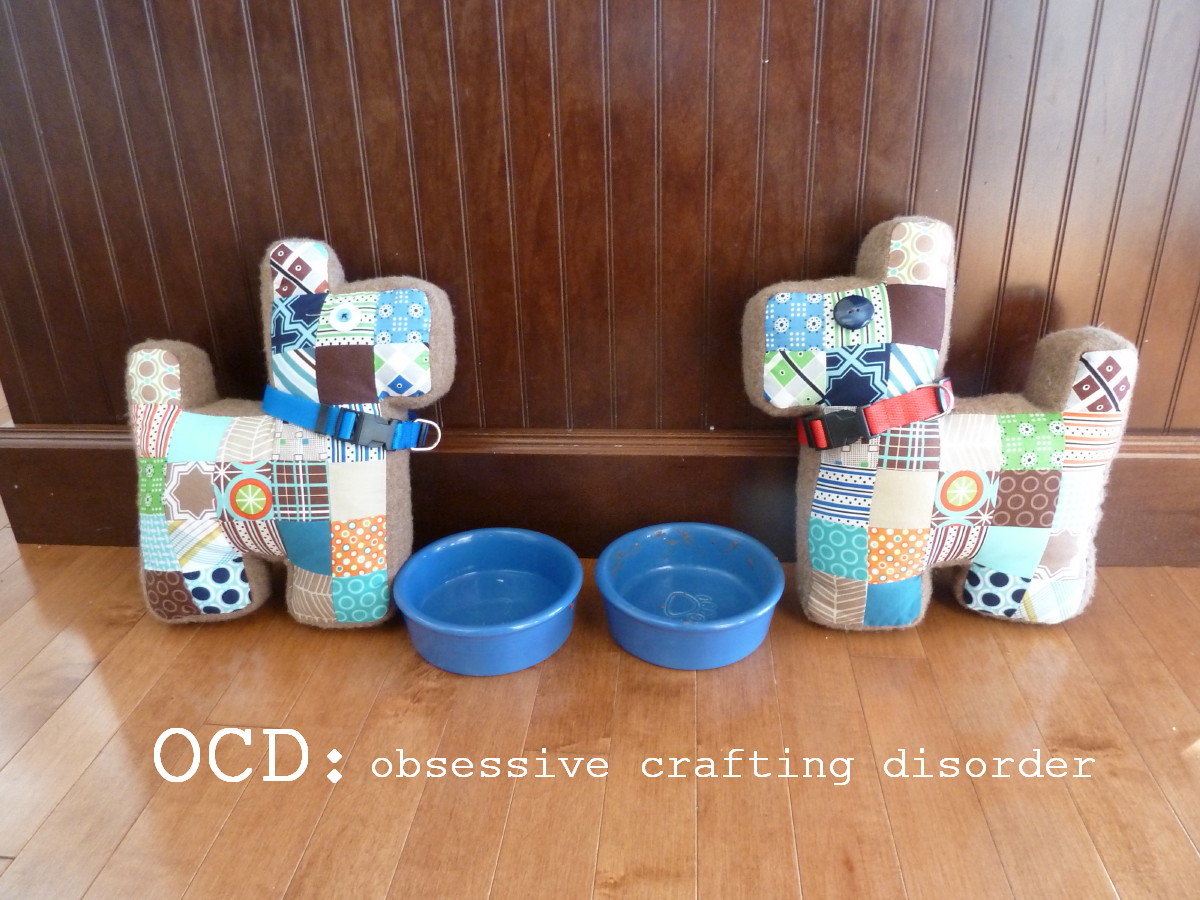
Do you boys need to go outside?
One of these little guys will be a Christmas gift for my 6 year old, Big G. He is my sentimental sweetheart who absolutely loves when I make things for him. I feel bad for him because I am always making things for his sisters- so many more options for the girls! But this one is just for him, and will also go great with his birthday quilt I am working on. The second Scottie will be adopted out to someone special on Christmas morning :-)

Friday, November 26, 2010

Congratulations, Kelli!

Some of you may know my Australian friend Kelli from Kelli's Pieces. Kelli was one of the very first "blogging friends" I made when I started blogging back in the spring. We hit it off right away...not only do we both love quilting, but also knitting, reading and vampires....can't be too many of us out there, can there? She throws out plenty of "mates" to match my "ehs", and we both have what can only be described as a bit of a twisted sense of humor :-) If we ever get to meet up in person, I am sure we could find some good trouble together in no time!

Anyways, Kelli is getting hitched, ummmm, pretty much right this very minute (!!!), so I got in cahoots with Amy to arrange to send her a wee surprise to celebrate. Here are her goodies:

First, a card of congratulations....I used to dabble in the scrapbooking/ card making thing as well, though not much lately! I was sure to add a little note to the back....
Second, a little embroidery hoop to mark the big day.
I made hearts out of some of my favorite scraps, including a sweet little snippet of Heather Ross from my ice cream Munki Munki of a cute couple in love. I hand stitched them to some linen and added some mismatched buttons. Then I ink-stamped the name and date in wonky, mismatched letters to add to the casual/scrappy feel. Just a cute little memento!

Was sure to give her an extra "eh" on the back.
And a package to a quilting friend would not be complete without some fabric love. It is a testament to how much I love Kelli that I sent along some pieces of my Munki Munki and some squares of some cute Japanese prints! I think she will like them...since she keeps telling me she is going to come over here to steal them and all. This will save her the criminal charge.
Anyways, Kelli, hope you have a wonderful wedding day, and that you and Paul enjoy many happy days to come. Congratulations!

Tuesday, November 23, 2010

Christmas Charities

Bloggers are such great people. And Christmastime brings out the best in the best, I think!

Two great blogging Christmas Charities this year! First, Kate at Swim, Bike, Quilt and Aunt Spicy, with the help of Amylouwho, are hosting 100 Quilts for Christmas.

Here is the low-down on how to participate:
1. Make a blanket
2. Take a picture
3. Donate the blanket to someone or an organization of your choice
4. Post a picture of the quilt on any of three link-up days, and of course there will be prizes, including a grand prize drawing on Wednesday, December 15!
5. Here are the link-up days and locations:
Monday November 29 -- Amy Lou Who's blog
Monday, December 6 -- Swim, Bike, Quilt's blog
Monday, December 13 -- Aunt Spicy's blog
6. Also posting pictures on Flickr

I have my Twin Quilt #3 still sitting in my sewing room....had intended to take it to the local Children's Hospital in conjunction with the Quilts for Babes charity by my friend Kathy at Magnolia Designs. This is just the motivation I needed to get it on over! So, here is a picture of my contribution to the 100 quilts:


If you haven't the time to whip together a quilt to donate this season, don't worry, there is another opportunity to do some quilting good this Christmas. Heather at {House} of a la Mode is hosting {Modern} Relief.

Some of our favorite quilting bloggers have donated some fabulous quilts which are being raffled off for US$10 per ticket, with all proceeds to benefit World Vision. If you would like to read more and buy a ticket, click here. I did! Raffle draw is December 1, so hurry over!

Saturday, November 20, 2010

Totes for my Little Ballerinas

Wow! I can't believe this is my 100th post...man, I talk too much! Thanks for listening :-) Don't worry, I brought you all some eye candy to go along with the babble today.

The two little beauties in my life love to dance. Spend a good part of each day on their tip-toes, twirling around...do you have little ballerinas like this, too?


They both take a dance class, and normally I tote their tiny little ballet and tap shoes back and forth to class in a crumby plastic bag. So, I thought they needed an upgrade.
Ta da! Ballerina totes! I think these are probably the most favorite thing I have ever made. And since I am in "Santa's Workshop" mode, I went ahead and made 5 of 'em...for family and friends!
The inspiration for these bags was this adorable Japanese ballerina print....isn't it sweet?
I only had a fat quarter, so I had to stretch my creative muscles to come up with a way to highlight the print but have enough to make all these bags. The body of the bag is rather simple, just a simple tote in a linen-look cotton, lined with a sweet pink polka dot. The straps used the same linen and a soft pink stripe.

I added a big pocket on the front, with a square of the ballerina print, some coordinating Hunky Dory, and some more pink polka dots. I also hand embroidered each girl's name in pink thread, and added some cute girly crochet trim.
I used some more Hunky Dory to make a loop for a big wooden button- an informal closure easy to manage with little fingers. If my name was Oprah, or Julie Andrews, wooden buttons would be one of "my favorite things."
As a little fun detail, I also added a tab with an appliqued ballerina...can never have too many ballerinas on a ballerina bag, after all! Each girl got a different little ballerina "character."


The finished size is about 12" by 13", ample for ballet shoes, tutus and a change of clothes.


One added bonus of this project is that, aside from one fat quarter of the ballerina print, all of the fabrics and notions I used were from my stash. I feel like a "real" quilter now....I used to have to always buy coordinates for everything, but have now amassed a pretty awesome variety of fabrics. It felt good to dip into it and use some up!

These will be under the Christmas tree, so we will still be "plastic bagging-it" for a few weeks...but I am sure they will be thrilled.

Tuesday, November 16, 2010

The latest

Lots of crafting stuff on the go lately, including some squares cut for my next quilt-in-progress. Did you know that I have completed 12 quilts to date, but not a single one has been for me or my family? I love giving them away, but have vowed that the next few will be for my own kids, the hubby and me....need one to snuggle with as the winter closes in on us! Anyways, this one here is intended for Big G, my son who will turn 7 (!!) in January. I am going scrappy and using a total of almost 100 (!! again!) fabrics in this one, inspired by this quilt I saw during the Blogger's Quilt Festival. So much fun to revisit so many of my favorite fabrics :-) Hope to get it done in time!
Also working on some SECRET projects...Christmas presents, including a Christmas swap that I am doing through Little Miss Shabby. My partner is the lovely Sue in Australia. We have quite different styles so it has been a fun challenge to "think outside the box" a bit! I have been working hard to get everything made so that it can be mailed with some hope of reaching her in time for the holidays! Here is a sneak peak of part of her Christmas package....
Promise to have "full reveals" of these and other WIPs soon!

Saturday, November 13, 2010

Christmas Wreaths- one way

Feeling a little festive over here....Let's hope it lasts because I have a huge pile-o-crafts planned to get done before the Big Day!
Found the tutorial for these lovely yarn wreaths here. I love them. So many color and texture combinations with the yarn and ribbon!

(can't find the beautiful aqua ribbon I had bought to go with this wreath....maybe it is hiding somewhere with my still-missing sewing ideas notebook??)

They take a bit of time, but now that I have my yarn-wrapping-rhythm, it's all good. And aren't these felt flowers wonderful?
Hang 'em on your front door, rest them on your mantle....and if all else fails, The Middle Child also thinks they make a great fashion accessory!
I have another set of different wreaths planned....will be back! Linking these up at Sew and Tell.
Just wanted to say thanks for a bunch of great blogs that have been featuring my stuff lately! Craft Gossip and One Pretty Thing both featured my Mini-Monet Christmas ornaments, Katie's Nesting Spot showed my rendition of Noodlehead's Mail Organizer, and Sew Mama Sew is featuring my Messenger Bag Tutorial on November 22, as part of their annual Handmade Holidays roundup. Thank you so much!

Thursday, November 11, 2010

Lest we Forget

Thank you.... for your sacrifices...for our freedom.

Tuesday, November 9, 2010

"Japanese Dinner" twin quilts

Phew, I finished! Here they are, Twin Quilts, Take 2!

I had so much fun making the Riley Blake Wheels twin quilts, and it was fun to start fresh with a totally new design for this set for another pair of good friends who also recently had twin boys. Like the "original" twin quilts, I wanted to make something coordinating, yet individual. To do this, I decided to use the same colors, but vary the design.

For the first quilt, I used a Bento Box design, framed by white sashing. For the second, I used the same concept, but in circles instead of squares. Due to the round shape, I named these "Mixed Sushi Rolls" as a nod to their square cousin. Together....a nice Japanese dinner :-)
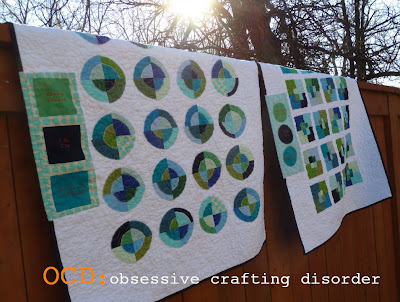
I used entirely blue and green solids (inspired by this quilt), just purchased from my local quilt store. I love love love this color scheme! I threw one print into the mix on each quilt top just to catch the eye- the square patterned Monaluna Mingle for the Bento Box quilt, and some Amy Butler Sunspots for the Sushi quilt.

To further tie the two quilts together, I added a patch of squares on the sashing on the Sushi quilt, and then circles in the same region on the Bento Box quilt. These patches in the sashing were mirrored on the backs. I even pieced in some of the patch material in the binding to give the illusion that it wraps around, resembling a tab. I personalized the quilts in these squares and circles with hand stitching in bright orange.

Aside from that small detail, the backs are otherwise identical.

I used the large scale Michael Miller Megatropolis print on the backs, which is funky, bright and fun. This print was actually the inspiration for these quilts....planned the back first, a little "backwards", I know! I bordered the print on either side by blue solids. The print is trimmed by strips of black dots that match the binding. I love this fabric and its soft little grey dots, just picked it up at my local quilt store. I think the black adds a bit of maturity to the quilt and grounds it, as well as really complimenting the Michael Miller print.
Quilting was a true lesson in frustration. I had originally intended to do the Sushi quilt in free motion curves, and the Bento in straight line boxes. Turns out my Bento Boxes were a little more wonky than I had planned...don't know how/why things don't line up when I cut them precisely, and use a 1/4 seam foot to piece, but hopefully down the road, experience will help with that. Anyways, the wonky factor made it very difficult to sew straight lines, because it either looked straight against the front and crooked on the back, or vice versa. More than a few cringes during this one! The vertical lines looked fine, but the horizontal ones were looking shabby, especially since the back panel did not seem to line up (looks like I suck at basting, too!). Anyways, ended up tearing it all out (ugh.), which took about SIX hours. In the end I decided to do free motion stippling for both to better camouflage the glaring errors! Oh, how I long to be a straight line goddess like Rita at Red Pepper Quilts! But I think it all worked out for a reason, the quilts better suit this randomness. This was only my second go at free motion (I also did it for the other twin quits) and I was much more comfortable and consistent (that is a very relative statement!). Funny thing is I realized after I was done that I had forgotten to drop my feed dogs...how did it even work?? Who knows, but I am happy with how it turned out. Especially once washed- so nice and crinkly!

Finished them off with little labels hand stitched onto the back:
Can't wait to deliver these to two very adorable little guys.....hope they like them! I will take payment in the form of snuggles, please!

Sharing with my friends at Quilt Story and Sew and Tell!

Sunday, November 7, 2010

munki munki swap?

Just wondering if anyone would be up for a little munki munki swap? I am needing some more prints for a new quilt I am dreaming up. I would like to collect some square in size 6" by 6". In return, I would share equivalent cuts of mine. I have:


1. goldfish in bags
2. bikes I have loved in white
3. sushi
4. wiener dogs on blue
5. VW vans on white
6. ice cram trucks on pink
7. farmer's market
(last print shown too small to share)

Shoot me an e-mail or comment if you are interested in swapping!

Speaking of new quilt ideas, I am trying not to freak out....can't find my "quilting notebook" that holds all my ideas, measurements, etc! This thing is like gold...where the heck did it walk off to? I am thinking the little humans may be involved. I am trying to stop the rising wave of panic....

Thursday, November 4, 2010

Mini-Monet Christmas Ornament Tutorial

Searching for the perfect heartfelt Christmas gift for that special grandparent, aunt or teacher? Look no further! These ornaments are the perfect personalized gift from your child. Using a piece of their art, you can make a very special keepsake to cherish for a lifetime.


Here is what you will need:
-white paper and colored markers for your Mini-Monet artist to work their magic!
-a scanner, color printer, and heat transfer paper (I got mine here)
-minimal picture editing know-how to add text to the art
-wooden embroidery hoop (mine was 3")
-hot glue gun and glue sticks
-a piece of white or natural colored muslin, cotton, or linen- to transfer image
-a piece of Christmas-y fabric for backing to image (note- I used an assortment of polka dots and stripes from my local fabric shop, plus some Moda Figgy Pudding)
-a piece of felt to finish the back of your hoop
-embroidery thread or Perle 8 thread in a coordinating color
-a piece of coordinating ribbon
- some jute, yarn or raffia for hanging


Time to create!
(Note- I have to apologize for the terrible photo quality, these were all taken in the wee hours of the night when there is no natural light to be found!)

1. Have your little artist create a holiday themed picture

2. Scan the picture and save to your computer

3. Use your computer's editing program to add text as desired (note- I used bold "teen light" font). I suggest a name for the art, the name and age of your little artist, and the date.

4. Open Microsoft Word (or equivalent). Click "insert" and then "picture" and "picture from file". Select your saved image. Scale this image by clicking and dragging on the corner until it prints out about 2" square. Make sure your text is still large enough to be readable!

5. Print onto transfer paper- be sure to select "print mirror image". Note- you may want to print a test-run on regular paper first to be sure of scale/size.

6. Transfer image to white fabric using iron according to transfer paper instructions.

7. Use a circle cutter or scissors and a steady hand to cut around the image in approximately a 2.25" circle.


8. Cut the backing fabric in a 5" circle. Center on hoop and tighten screw of hoop in place.
Use hot glue gun to fold over on back side and secure in place.

9. Hand stitch image white fabric with image onto backing fabric using embroidery thread or Perle 8 thread.
10. Cut felt or other back material in circle measuring 3.2" in diameter. You may want to add a tag like mine before attaching. Glue in place using glue gun, and use scissors to trim any excess.


11. Tie on a piece of ribbon to the screw of the hoop. Add a string for hanging.

You are done!

I hope you and your "Mini-Monets" enjoy hanging this special ornament on the tree for many Christmases to come!

I hope you enjoyed this tutorial. I would love to see your creations in my Flickr pool! Please feel free to blog about them, but do link back to this post, please! Thank you!
Linking up to some of the great parties on my sidebar like Crafty Soiree , Sew-and-Tell Fridays and Quilt Story :-)